✅ Read Before Defining Your Locations:
Audit Now lets you define custom location levels (like Region, Branch, Store) and then create real-world locations within that structure. This hierarchy powers key features like user permissions, audit assignments, and analytics filtering — and ensures your platform mirrors your business layout.
Step 1: Define Your Location Levels
The Level Management page lets you set up the tiers of your location hierarchy — from broadest (e.g. Country) to most specific (e.g. Store).
How to Add Location Levels:
- Go to Settings > Location
- Click Level Management button
- Click “Add Same Level” or “Add Child Level”
- Enter a level name (e.g. Region, Site, Zone)
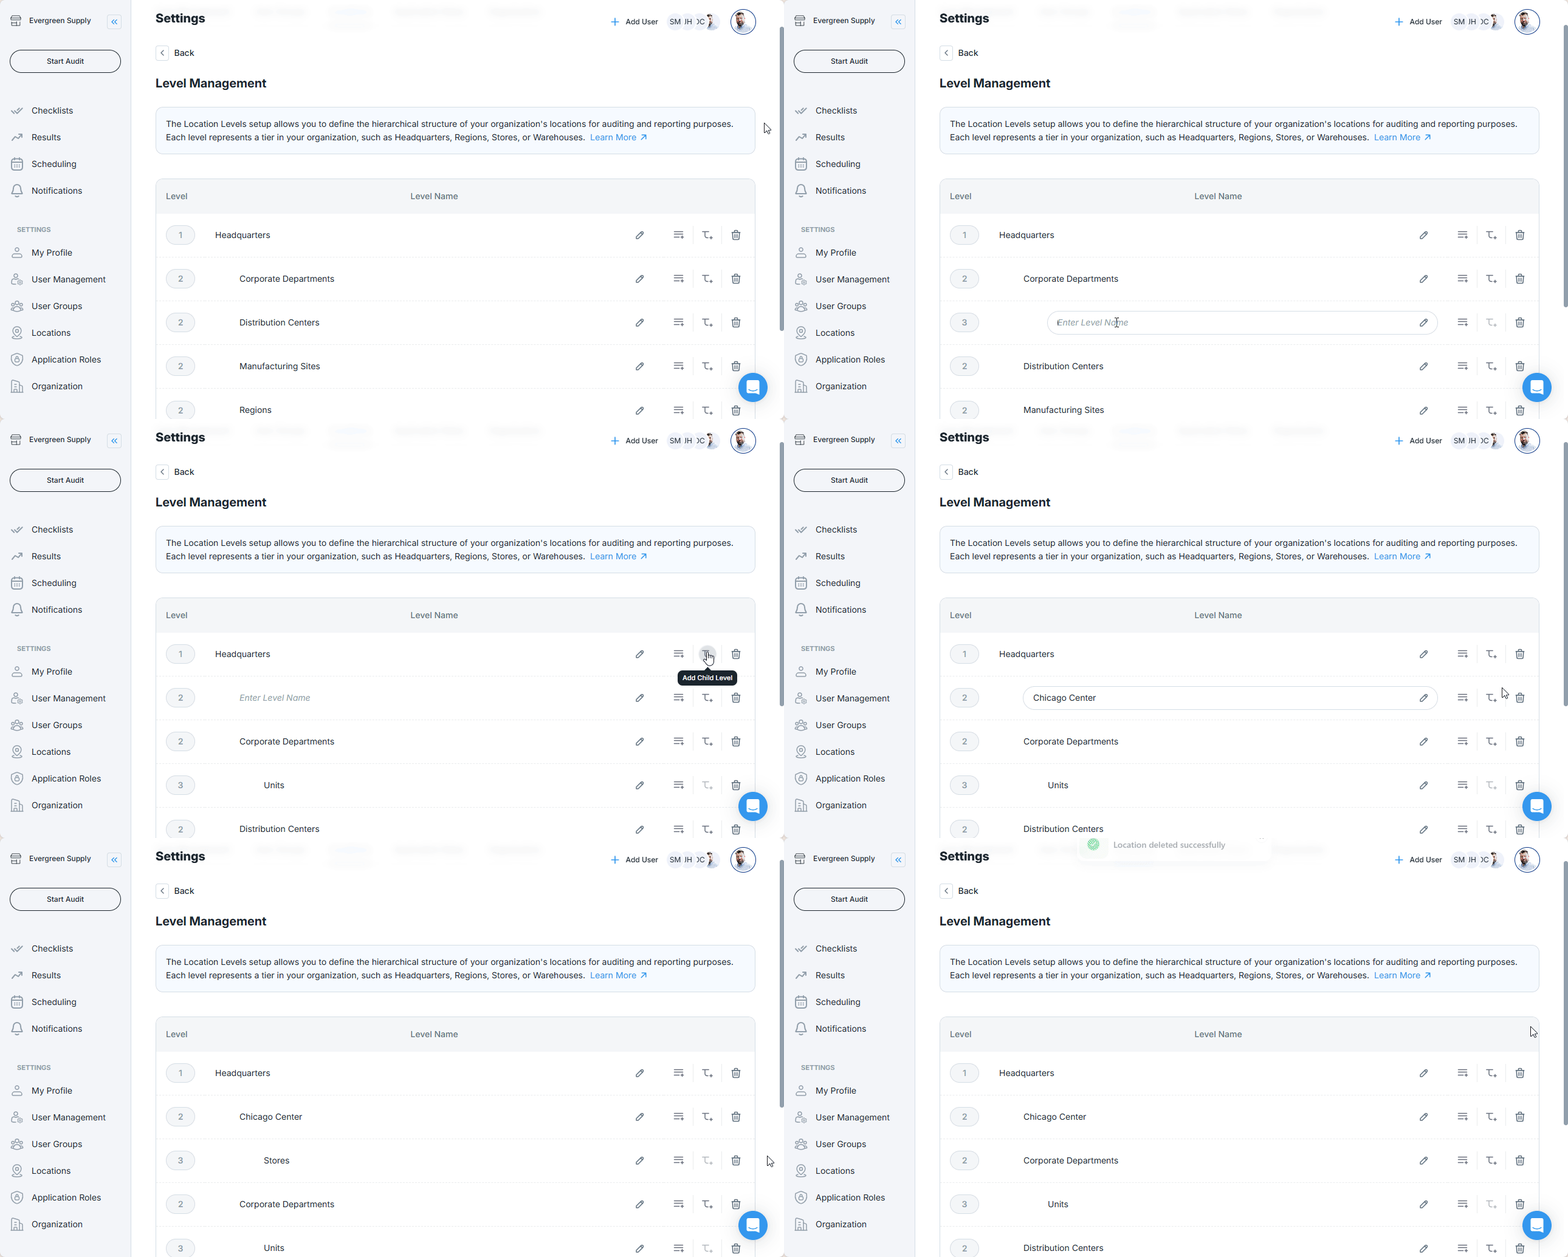
You can rename levels anytime. This won’t delete existing locations but may affect hierarchy structure.
Step 2: Add and Manage Locations
After defining levels, go back to the Manage Locations page to start populating your organization’s actual locations.
How to Add a Location:
- Go to Settings > Location
- Click on an empty location field and fill in:
- Name (e.g. Chicago Branch)
- Level (choose from your defined levels)
- Click “Add Same Level” or “Add Child Level” to add more locations
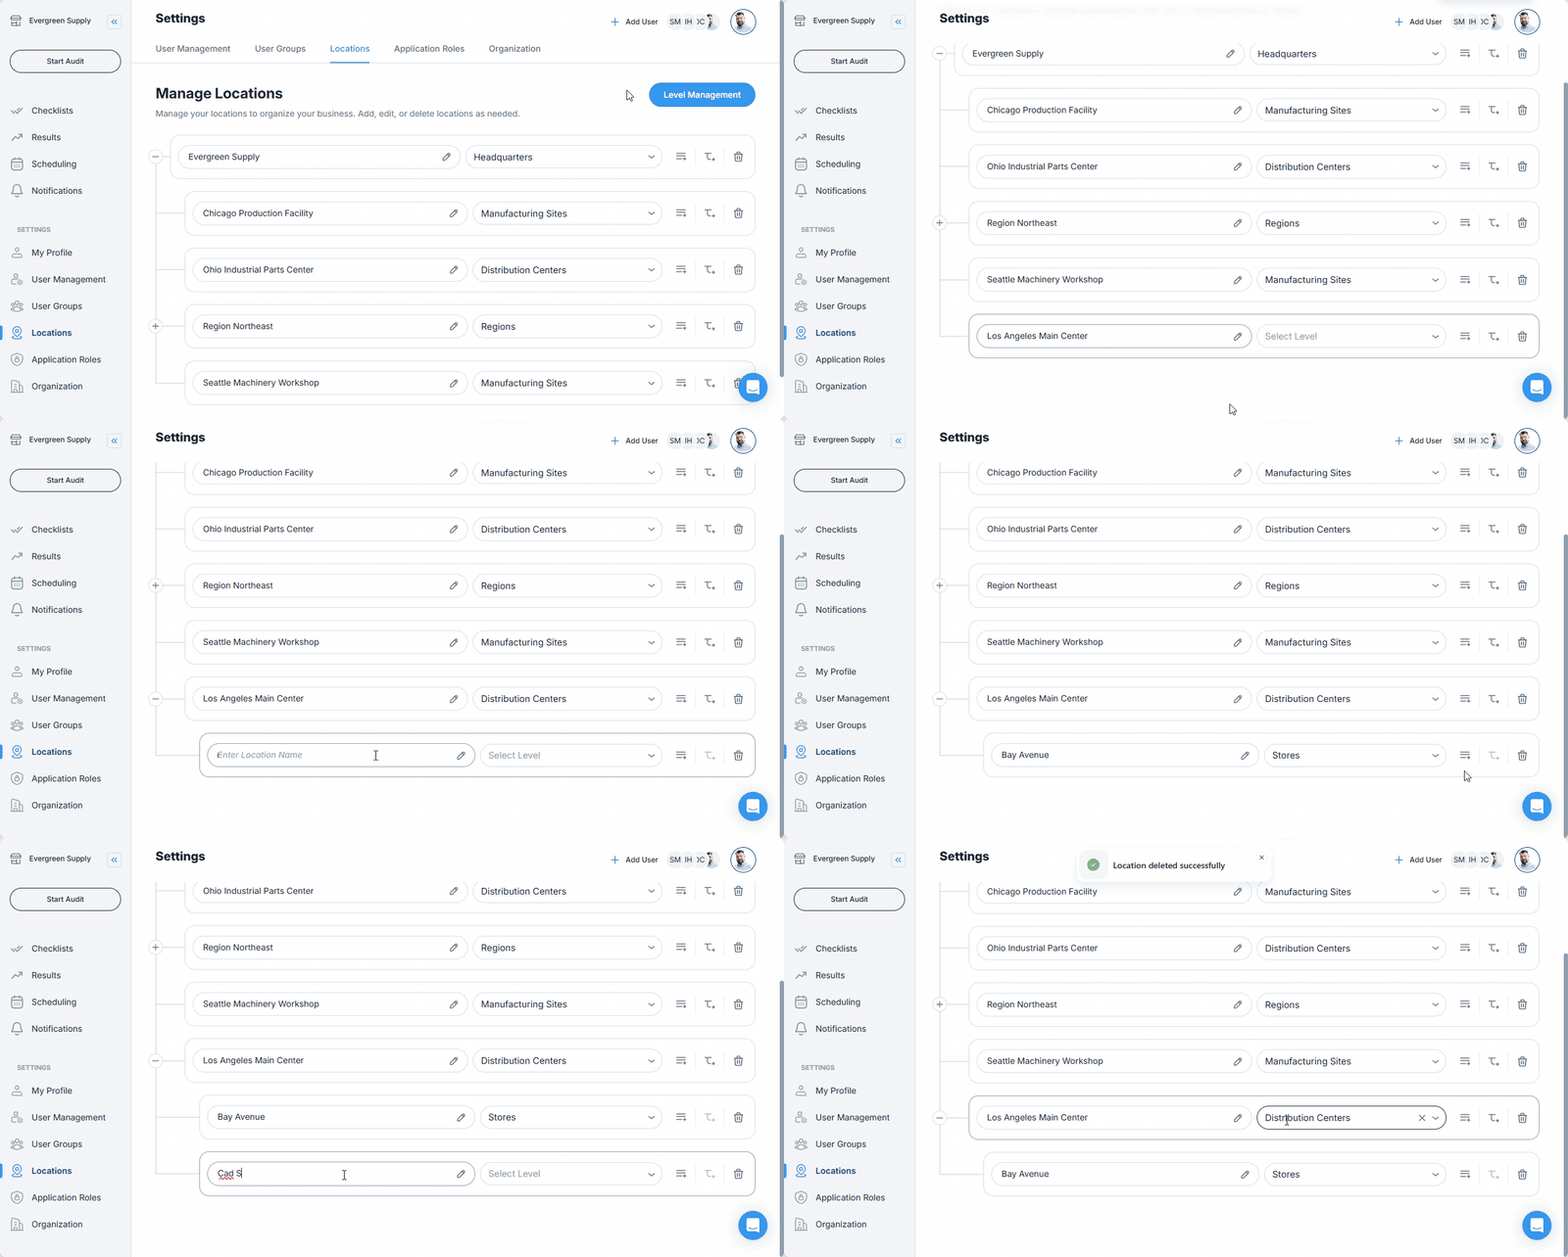
Locations will now appear in a nested list based on your defined structure.
Why Location Setup Matters
| Feature | Benefit |
|---|---|
| Role-based access | Assign users to specific locations so they only see relevant audits |
| Targeted scheduling | Plan audits for each location level (e.g. quarterly HQ audits, weekly store checks) |
| Powerful reporting | Filter insights by Region, Store, etc. to identify trends and risks faster |
Best Practices
- Keep levels simple: Use 3–4 levels max (e.g. Country > City > Site)
- Consistent naming: Stick to standard formats (e.g. “NYC – Retail 1”, not “retail 01”)
- Clean up regularly: Archive or delete old locations to reduce clutter
Next article: User Groups – Organize Users by Team or Function →