Where to Find Access Controls
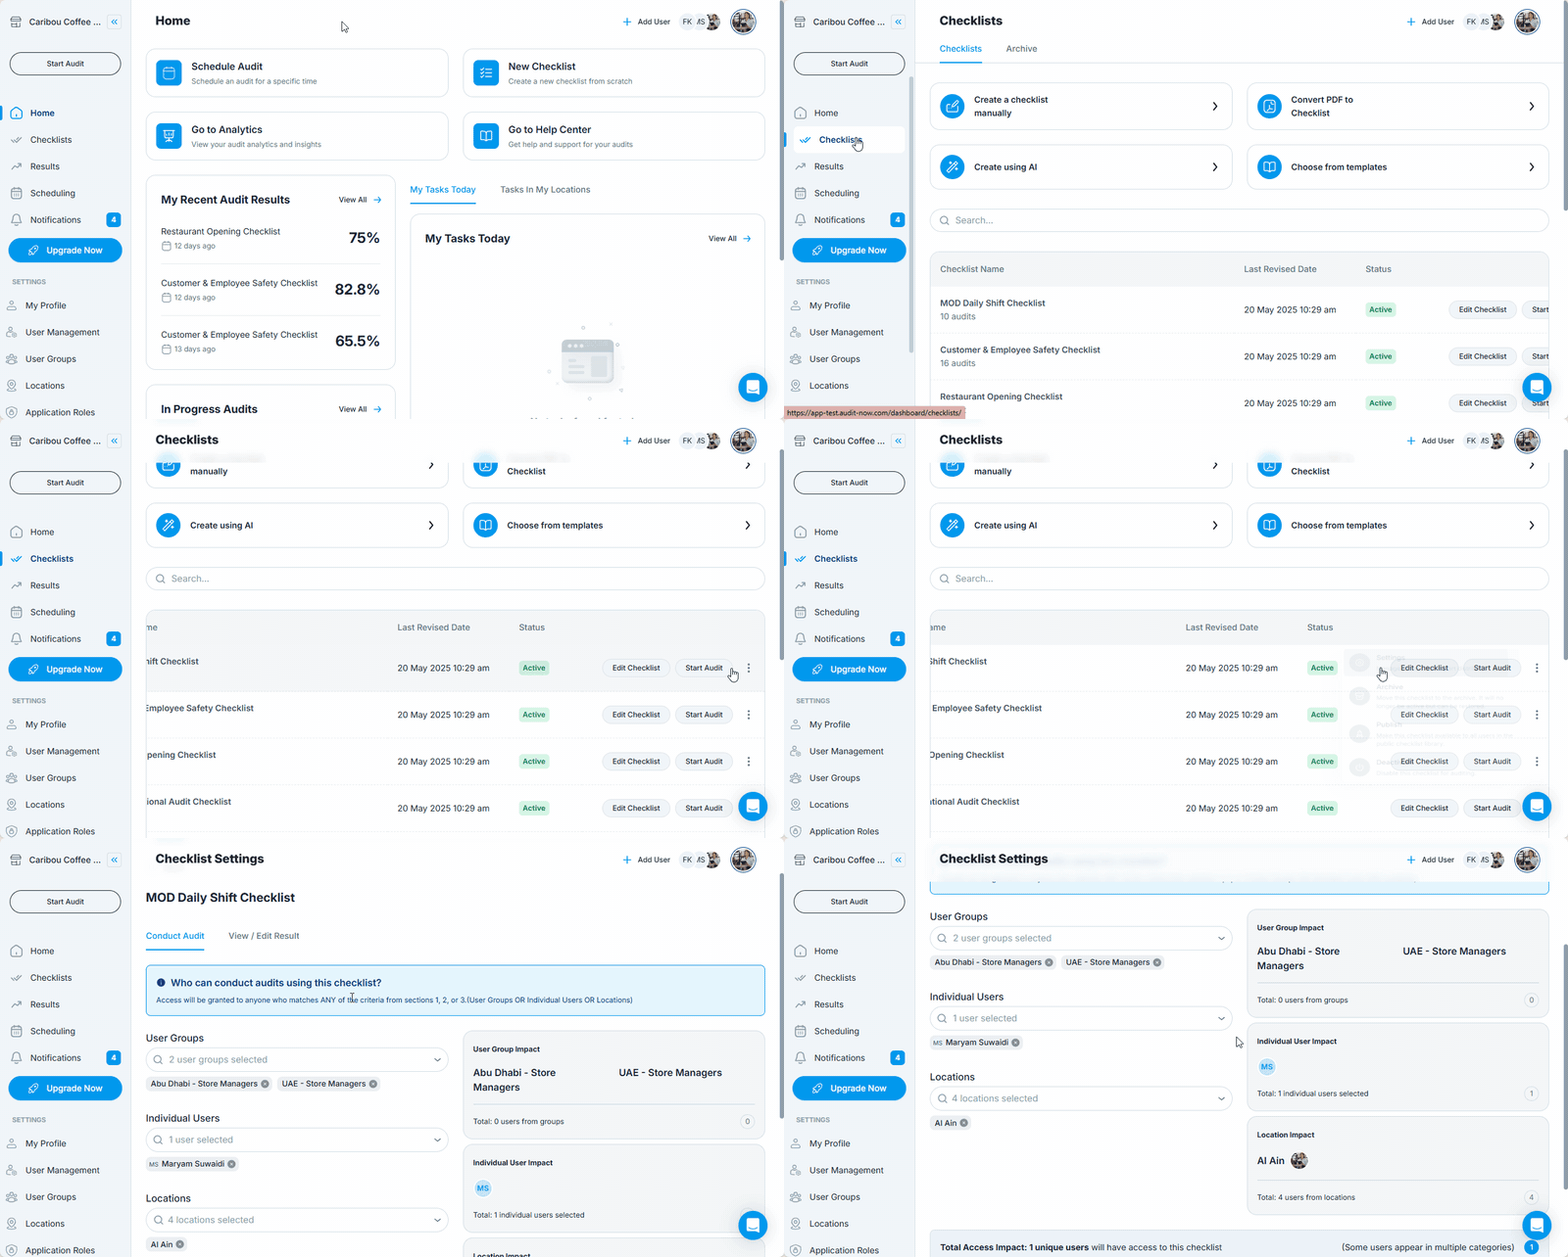
- Go to Checklists from the left-hand menu
- Find the checklist you want to configure and click on its ellipsis
- Select Settings
- Go to Access tab
- Stay on Conduct Audits tab
Assign Access Permissions
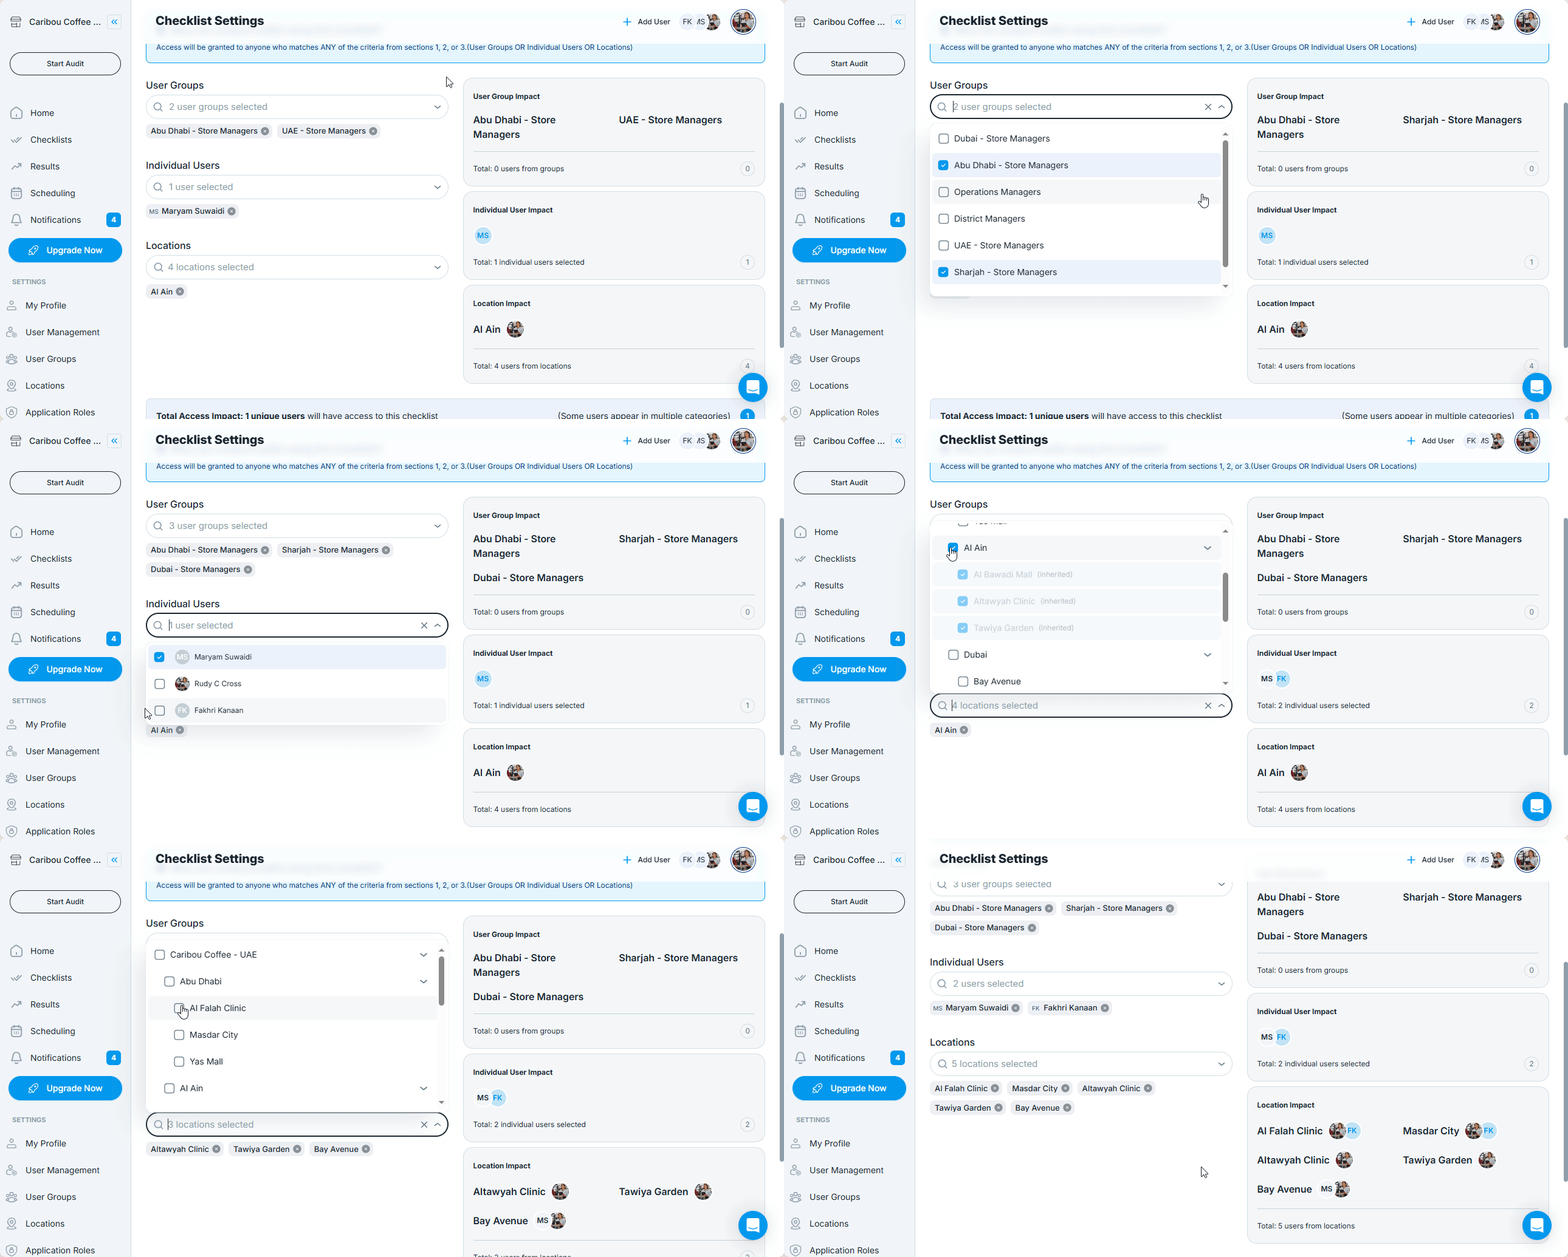
In this section, you define who can use the checklist to conduct audits. You can assign access by:
- Individual Users – Grant access to specific users
- User Groups – Assign to a group of users (e.g. Safety Inspectors)
- Locations – Make the checklist available only for specific sites
Each field has a searchable dropdown where you can select one or more values.
You must assign at least one permission to make the checklist available.
Saving Your Changes
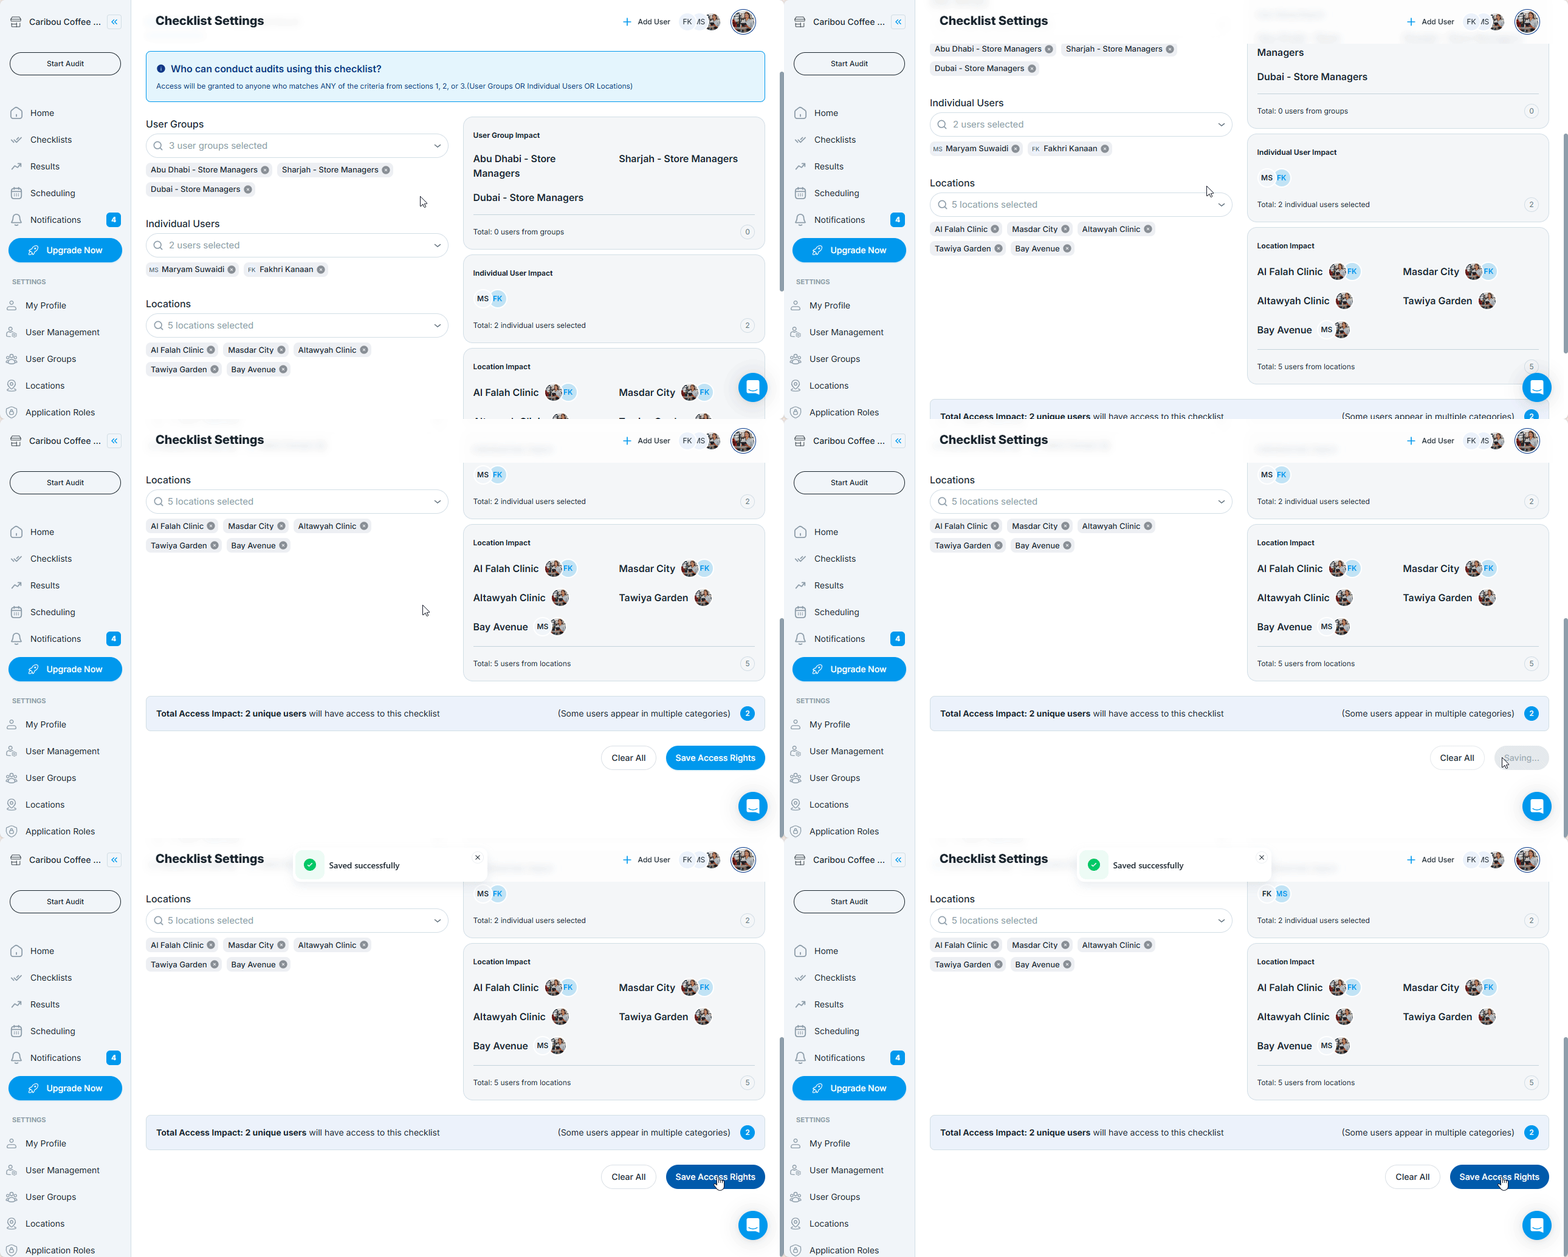
Once your access settings are defined:
- Click Save Access Rights at the bottom of the screen
- These permissions will now be enforced during task scheduling and audit access
What Happens Next?
- Only assigned users, groups, or locations will see this checklist when starting an audit
- Users without access will not be able to view or start audits using this checklist—even if assigned a schedule
Best Practices
- Use User Groups to simplify role-based access across checklists
- Limit access to specific locations for site-specific checklists
- Review permissions regularly, especially after team or location changes
Next article: Manage Who Can See or Edit Audit Results →